How to make a great photo slideshow with PowerPoint
 (No Ratings Yet)
To make your own slideshow, follow the simple step-by-step instructions below. However, before you begin, gather all of the photos you intend to utilise into one folder. This will save you a significant amount of time and make your job much easier.
1: How to insert pictures on PowerPoint
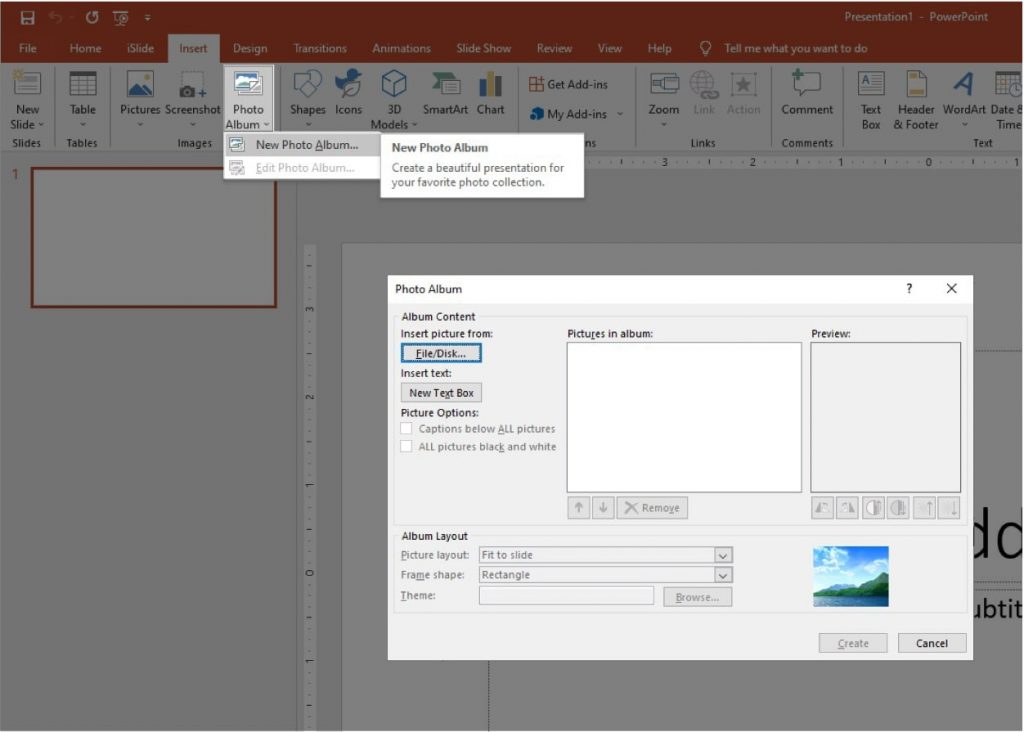
Create a new presentation in Microsoft PowerPoint. Select Photo Album from the Insert menu. There are two options in the dropdown menu that appears: “New Photo Album” and “Edit Photo Album.” Click “New Photo Album” unless you wish to alter an existing slideshow.
Select “File/Disk” from the drop-down menu. This should start Windows Explorer and allow you to navigate to the folder where you’ll be selecting your photos.
Insert pictures
Hopefully, you already have a folder with all of the necessary images. Create a folder on your computer and copy all of your images into it if you don’t have one already. Go to this folder and begin choosing individual images. To choose photographs that are not contiguous, hold down the Ctrl button key on your computer and click. To swiftly choose photographs in a continuous line, hold down the Shift button key. If you need all the pictures in a folder, simply type Ctrl+A key button.
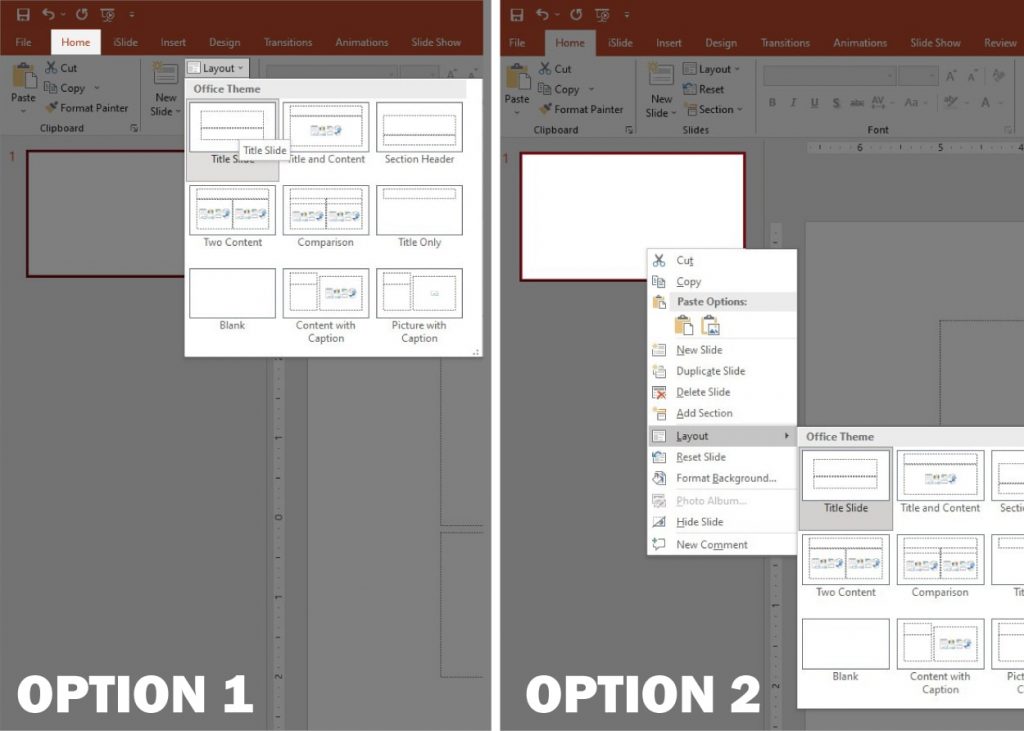
2: Choose your layout
Slides are the building blocks of a presentation. You can create a blank one, or you can select from a variety of layouts that are available. Find out more guidance on the slide layout in powerpoint in this article.
Method:
● Click the New Slide button icon on the Home tab.
● You can also use the shortcut method for creating a layout. Type Ctrl + M, or right-click a slide in the Thumbnails pane and choose New Slide from the menu.
In the Thumbnails pane, the new slide is inserted after the selected slide.
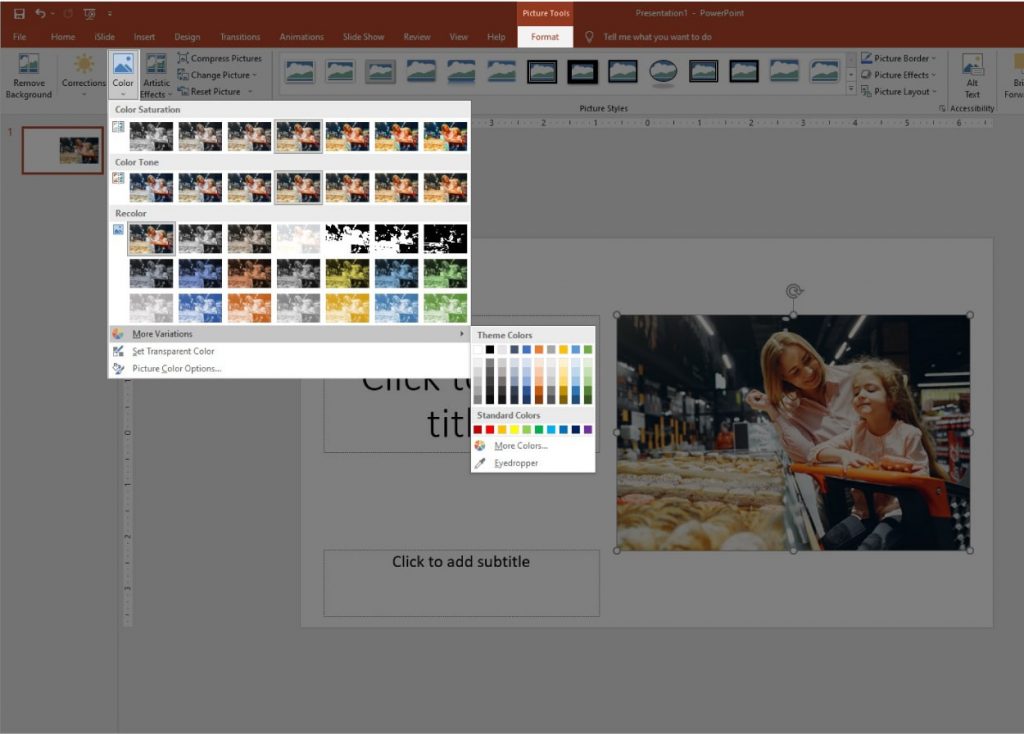
3: Adjust the picture light and color settings
A picture’s colour strength and tone can be changed, and it can also be recolored. You can use a variety of colour effects on your image.
● Choose the image you’d like to edit.
● In the Picture Tools menu, go to Colors and select the tone, saturation or recolor.
If you don’t see the Format or Picture Tools options, make sure you’ve selected a photo. You may need to double-click the image to select it and open the Format tab.
Do one of the following:
Click one of the standard changes under Color Saturation to change the saturation of a colour.
Click one of the usual changes under Color Tone to change the colour temperature.
Click one of the usual modifications under Recolor to apply a built-in stylistic effect, such as grayscale or sepia tone.
You can fine-tune the strength of your colour change by selecting Picture Color Options, or you can customise your own colour by choosing More variations > More colours.
4: Add special effects
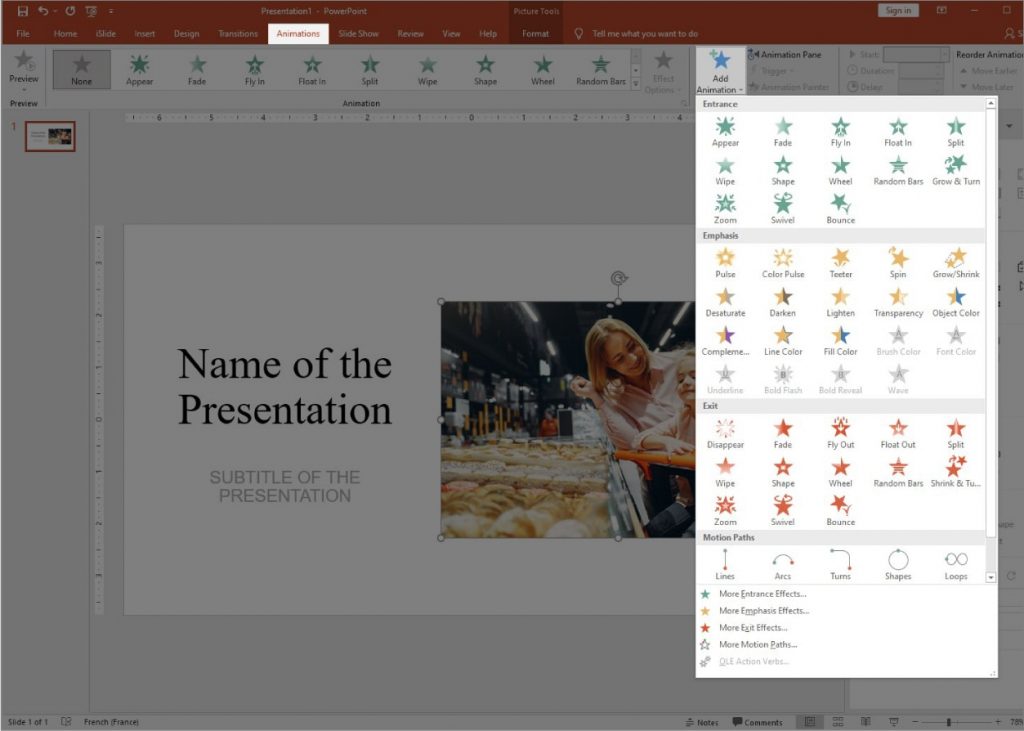
In your PowerPoint presentation, add movement and effects to text, photos, shapes, and objects. An object can be made to appear, vanish, or move using effects. They have the ability to change the size or colour of an object. There are four kinds of animation effects in PowerPoint – entrance, emphasis, exit and motion paths. Each effect has a sign that specifies the way the effect works.
Entrance
The way objects appear on your slide is controlled by entrance effects.
Emphasis
The audience’s eye is pulled to the dynamic object through emphasis effects.
Exit
The animated items’ exit effects control how they will leave the slide.
Motion paths
The movement of your text or objects around the slide is controlled by motion routes.
Method:
● Choose the object or text you want to animate.
● On the Animations tab of the ribbon, in the Animation group, select the Effect Options, and then choose the animation effect that you want.
If you want even more options, go to the bottom of the gallery and select the Effect Options.
5: Create transitions and animation
Objects move onto, off of, and around your presentations using animations. The way your presentation progresses from one slide to the next is controlled by transitions.
Add animations
To choose an effect:
● Choose the object you want to animate.
● Select the Animations tab.
● Select the Animation to apply to your object
● Click on Animation pane to choose the order of the animation
● Then in the Effect Options window, customize your animation.
To modify an effect:
- Select the desired start technique by clicking the down arrow next to the Start field in the Custom Animations pane.
- On the Custom Animations pane, click the down arrow next to the Property field and select the property you want. The Direction, Size, or some other characteristic could be labelled in the Property field.
- In the Animation Pane, right click on the animated object and select Effect Options.
- In the Effect Options window, go to Timing, and change the speed in the Duration menu.
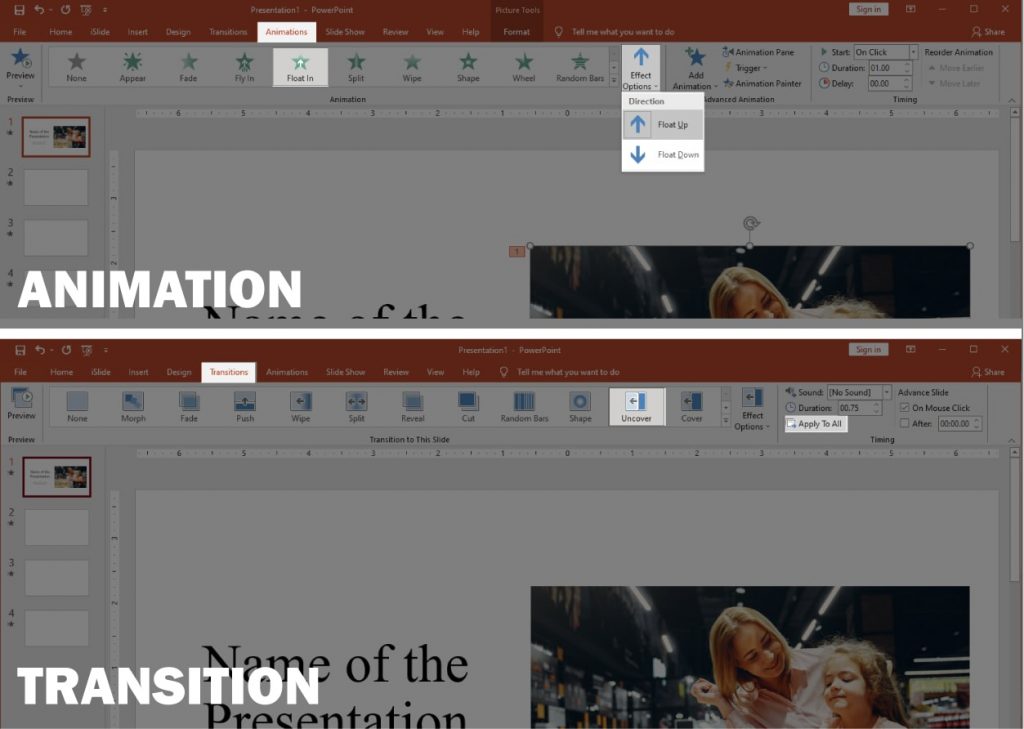
Add transition
To apply a transition to all slides, follow these steps:
- To begin, go to the Transitions tab.
- Select the More button from the Transition to this Slide group. A menu of transitions appears.
- Choose the transition you want to utilise. As you move your pointer over each transition, PowerPoint displays a live preview.
- Click the Apply to All button in the Timing panel.
Go to the animations tabs to add a sound to a transition:
● Choose the Transitions tab.
● Chose the sound you want by clicking the down arrow next to the Transition Sound field. PowerPoint plays the sound when you roll your pointer over it.
To change the speed of a transition:
● Click the Transitions tab.
● Selection the speed you want by clicking the down arrow next to the Duration field.
Check the On Mouse Click check box if you want the transition to happen after the presenter clicks the mouse. If you want a transition to happen after a certain amount of time has passed, select the Automatically After check box and then enter the amount of time you want to wait before the transition happens. The On Mouse Click and Automatically After check boxes are both located in the Animations tab’s Transition to This Slide group.