
 4.50/5 (2 votes)
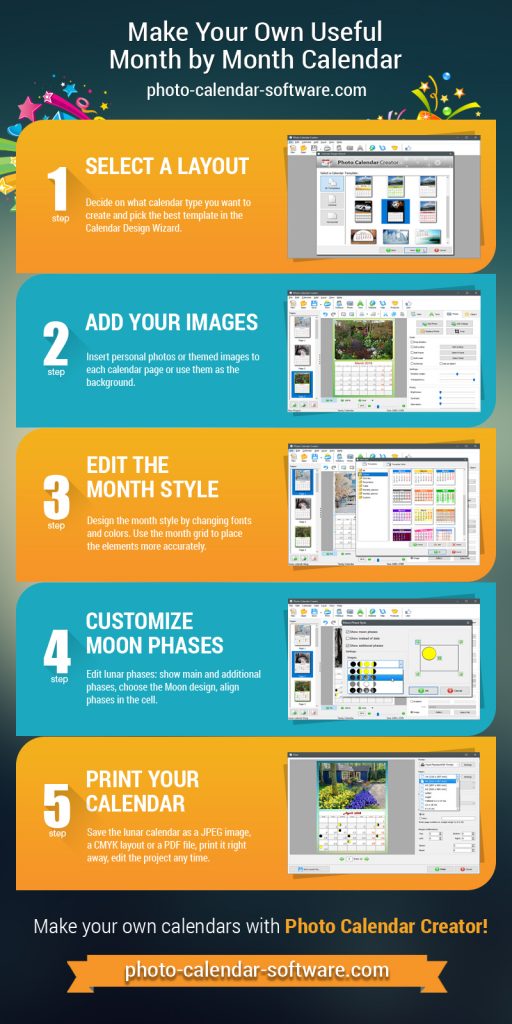
Do you believe that our lives depend on the planets position? Ancient people noticed the Moon’s effects and created the month by month calendar, also known as the lunar calendar. It’s based on the cycles of the Moon’s phases and is different than the traditional Gregorian calendar which we’re used to.
According to centuries-long observations, the Moon has an effect on most sides of people’s lives: health, work, hobbies and relations. Sounds fantastic, doesn’t it? However, enthusiastic gardeners know for sure that successful plant cultivation falls into line with moon phases. Want to track them? Then let’s create a month by month calendar with lunar phases using this step-by-step guide.
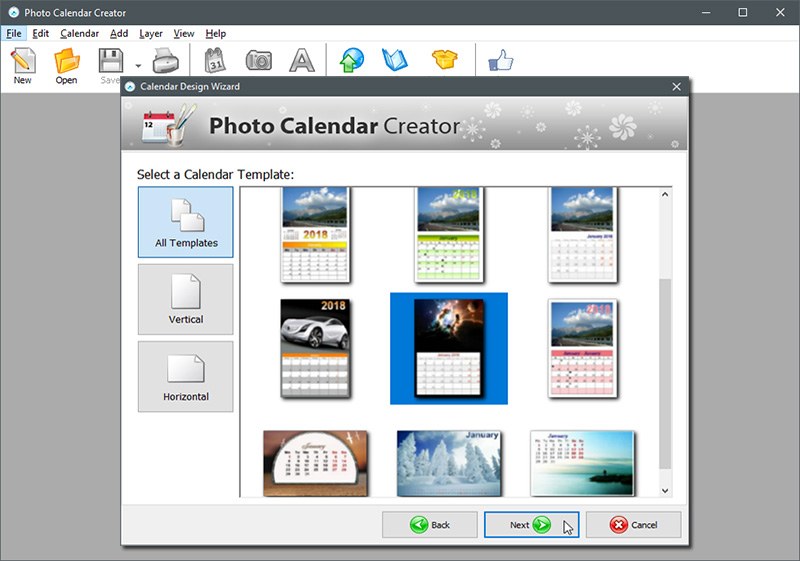
Step 1 – Select a Layout
Guess what you’ll need to start your project. Of course, a powerful calendar maker. I’d recommend you go for Photo Calendar Creator software: http://photo-calendar-software.com/home-calendar-software.php It comes with a wide set of ready-made templates, therefore you’ll find the one that suits your fancy most! Pick the page orientation you prefer: horizontal and vertical layouts are available. Consider creating a planner for a year, this one allows you to make all 12 pages in the same style.
Step 2 – Add Themed Images
What makes your calendar second to none? Customization does. You are the designer now so add as much individuality to your creation as you want. You can apply memorable photos or meaningful images to each month page. As for me, I’m going to use themed garden pictures in my lunar calendar example. Try using your images as the page background or liven up your calendar with photo collages.
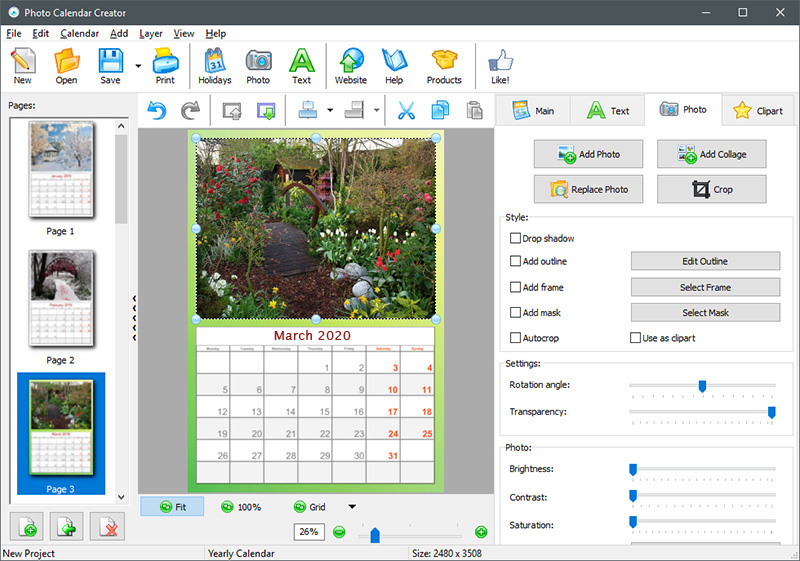
Step 3 – Change the Month Design
Think the month table looks boring? Make it fancy! Nothing could be easier – the fonts & colors, the size can be changed in the blink of an eye. Photo Calendar Creator offers an impressive choice of different fonts, no way will you overlook a perfect one for your calendar! By the way, use the page grid so you can place your photos and the month table more accurately. That will add a whole lot of premium quality to your month by month calendar.

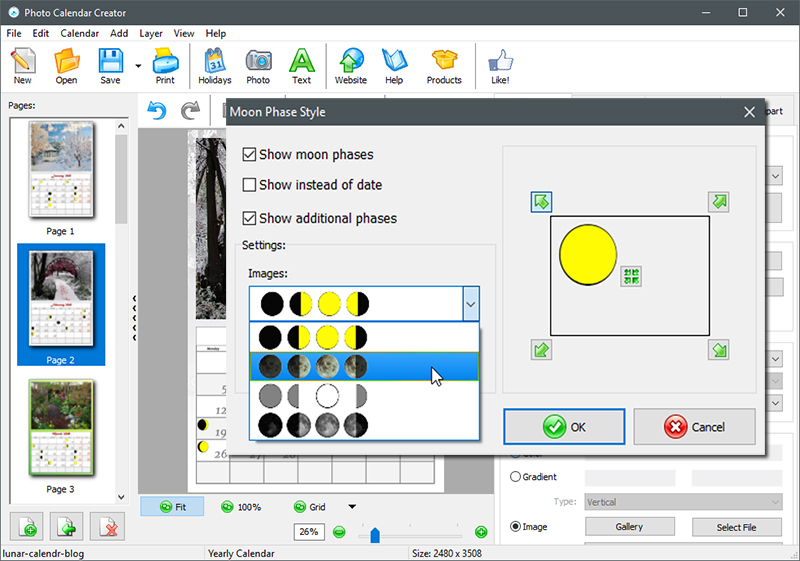
Step 4 – Customize the Moon Phases
Don’t think that I forgot to add the main feature to the lunar calendar. It’s high time to check the Show Moon phases box and to edit the style. The main Full and New Moon phases can be displayed in your planner alone as well as together with the additional First and Third Quarters. Select the Moon’s images design – it can look either realistic or pictured. Take a look at your calendar and make sure that the lunar phases are displayed now.
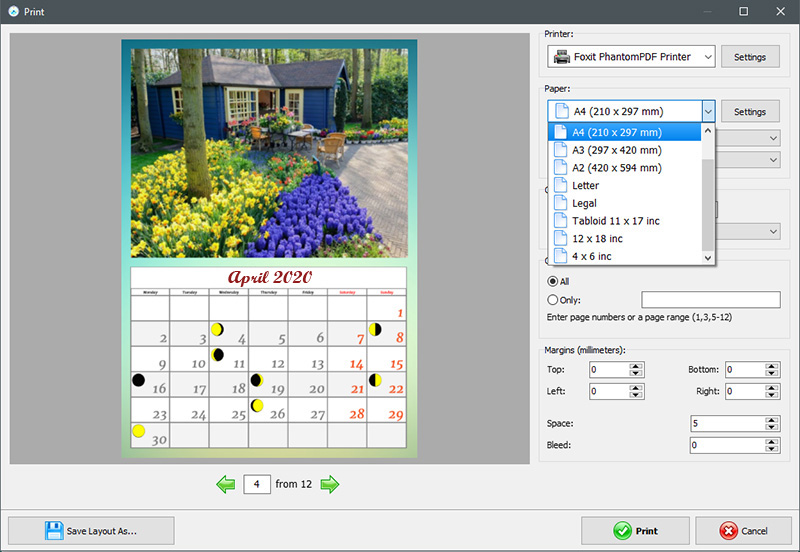
Step 5 – Save and Print Your Lunar Calendar
Now you’re done with the creative part and just two clicks away from holding your fabulous planner in your hands. I bet you’re impatient to hang it on the wall. Have a printer at home? Set the page size, hit the Print button and – voilà! – you’ve got it. Or save the project in the PDF or TIFF format and print the month by month calendar at a print shop.
In the guide above I tried to show you how to make a vertical lunar calendar. Now take a glance at this horizontal planner – what page orientation would you go for? It’s nearly as attractive and just as effective as the vertical one.
I hope this piece of advice on how to create a lunar calendar was helpful and you will make an engaging and really useful planner for yourself. Plan your day to day life according to moon phases and you’ll gain a reputation of the luckiest soul around!